
PCI Scans
Certain SAQs require a network scan to be completed to be PCI Compliant.
Use this page to complete the PCI scanning flow, open the Network Scanning page, and prepare your scan targets.
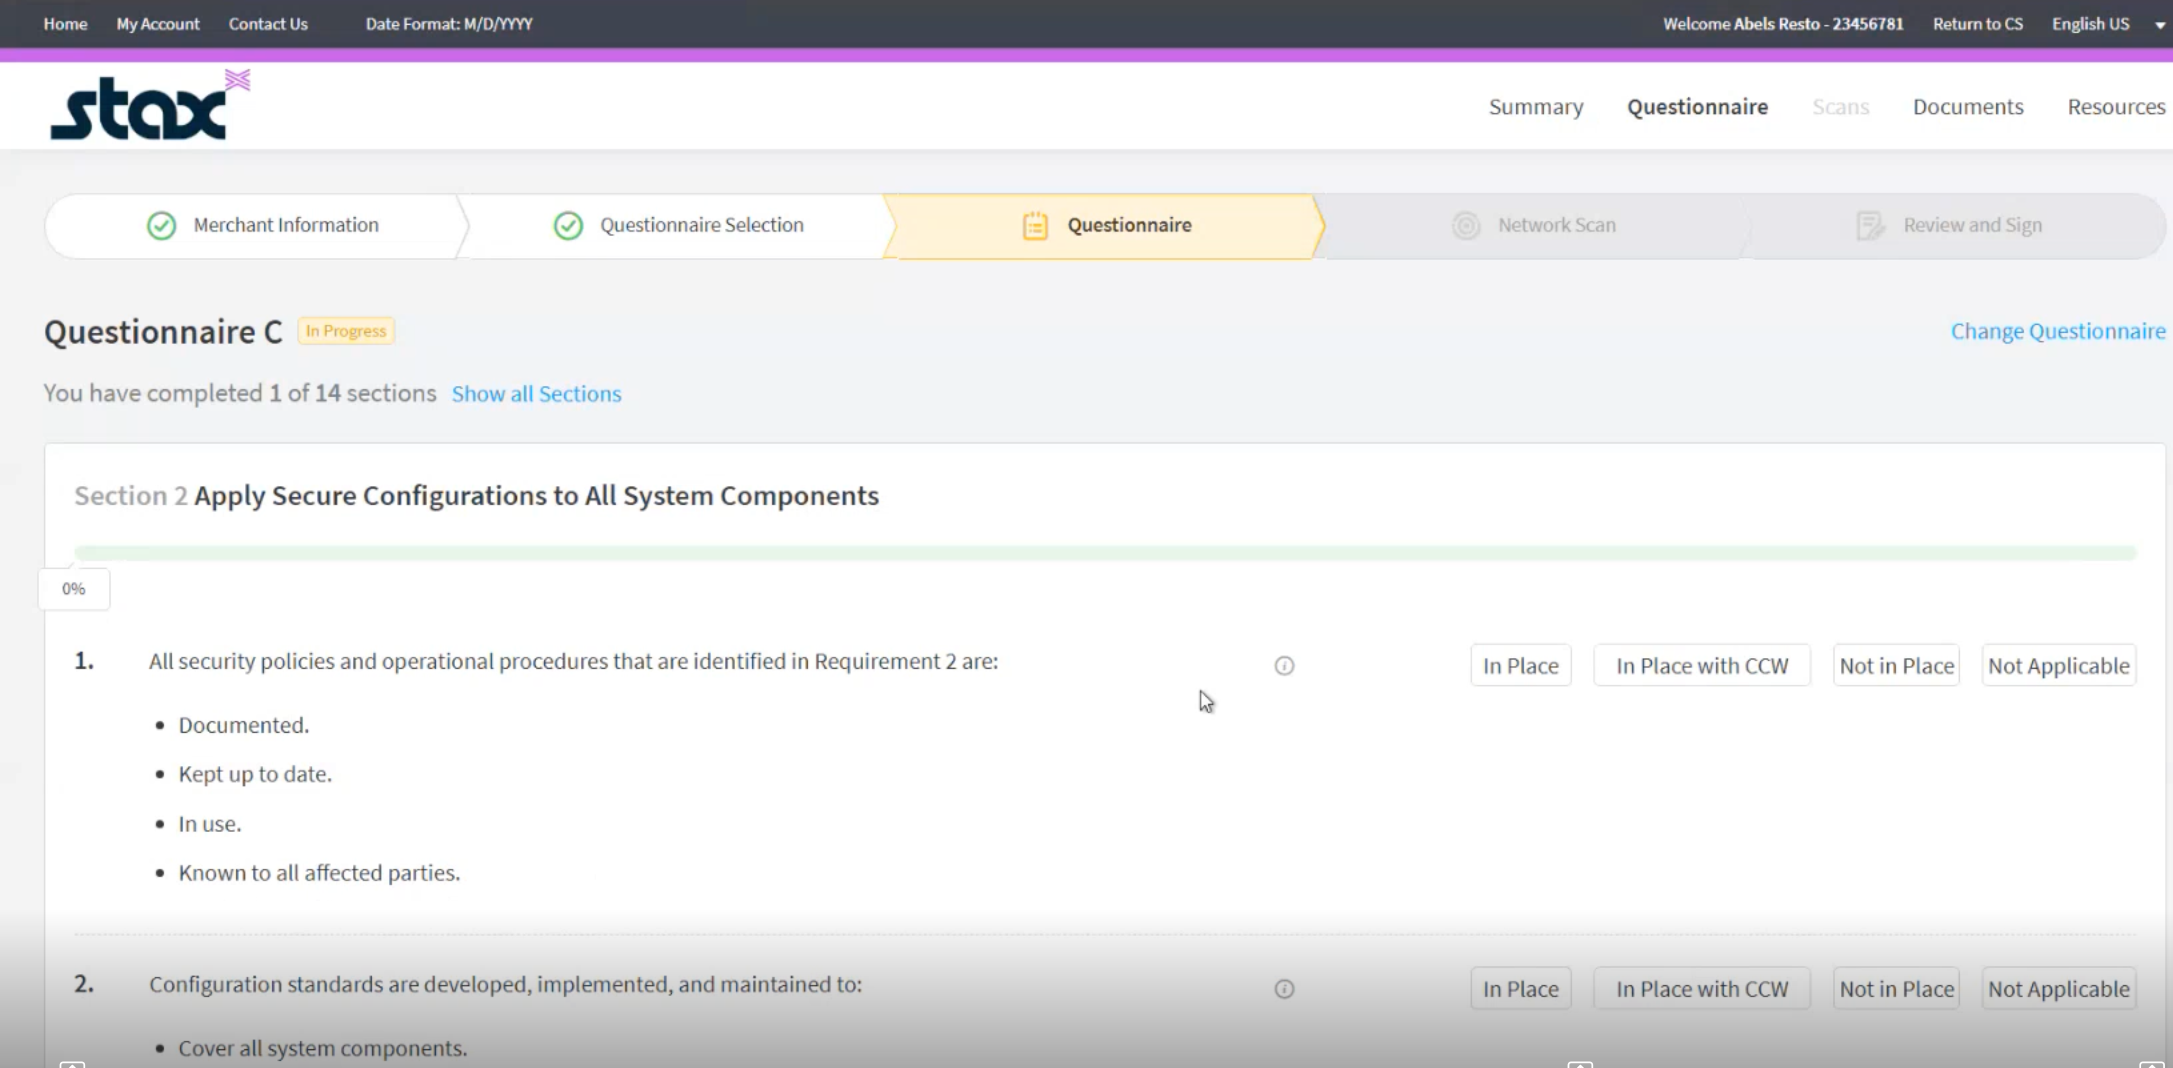
If your SAQ requires a network scan, the PCI Compliance Questionnaire will include a slightly different flow than the non-scanning version.
-
Complete the steps in the PCI Compliance Questionnaire guide.
-
After you complete the questionnaire, click Continue.
-
Open the Network Scanning page to manage scan targets and launch a scan.
Network Scanning
Network scans are required for the following SAQs:
- SAQ A
- SAQ B-IP
- SAQ C
On the Network Scan page, you can monitor current scans, start a scan, and manage which sites to scan.
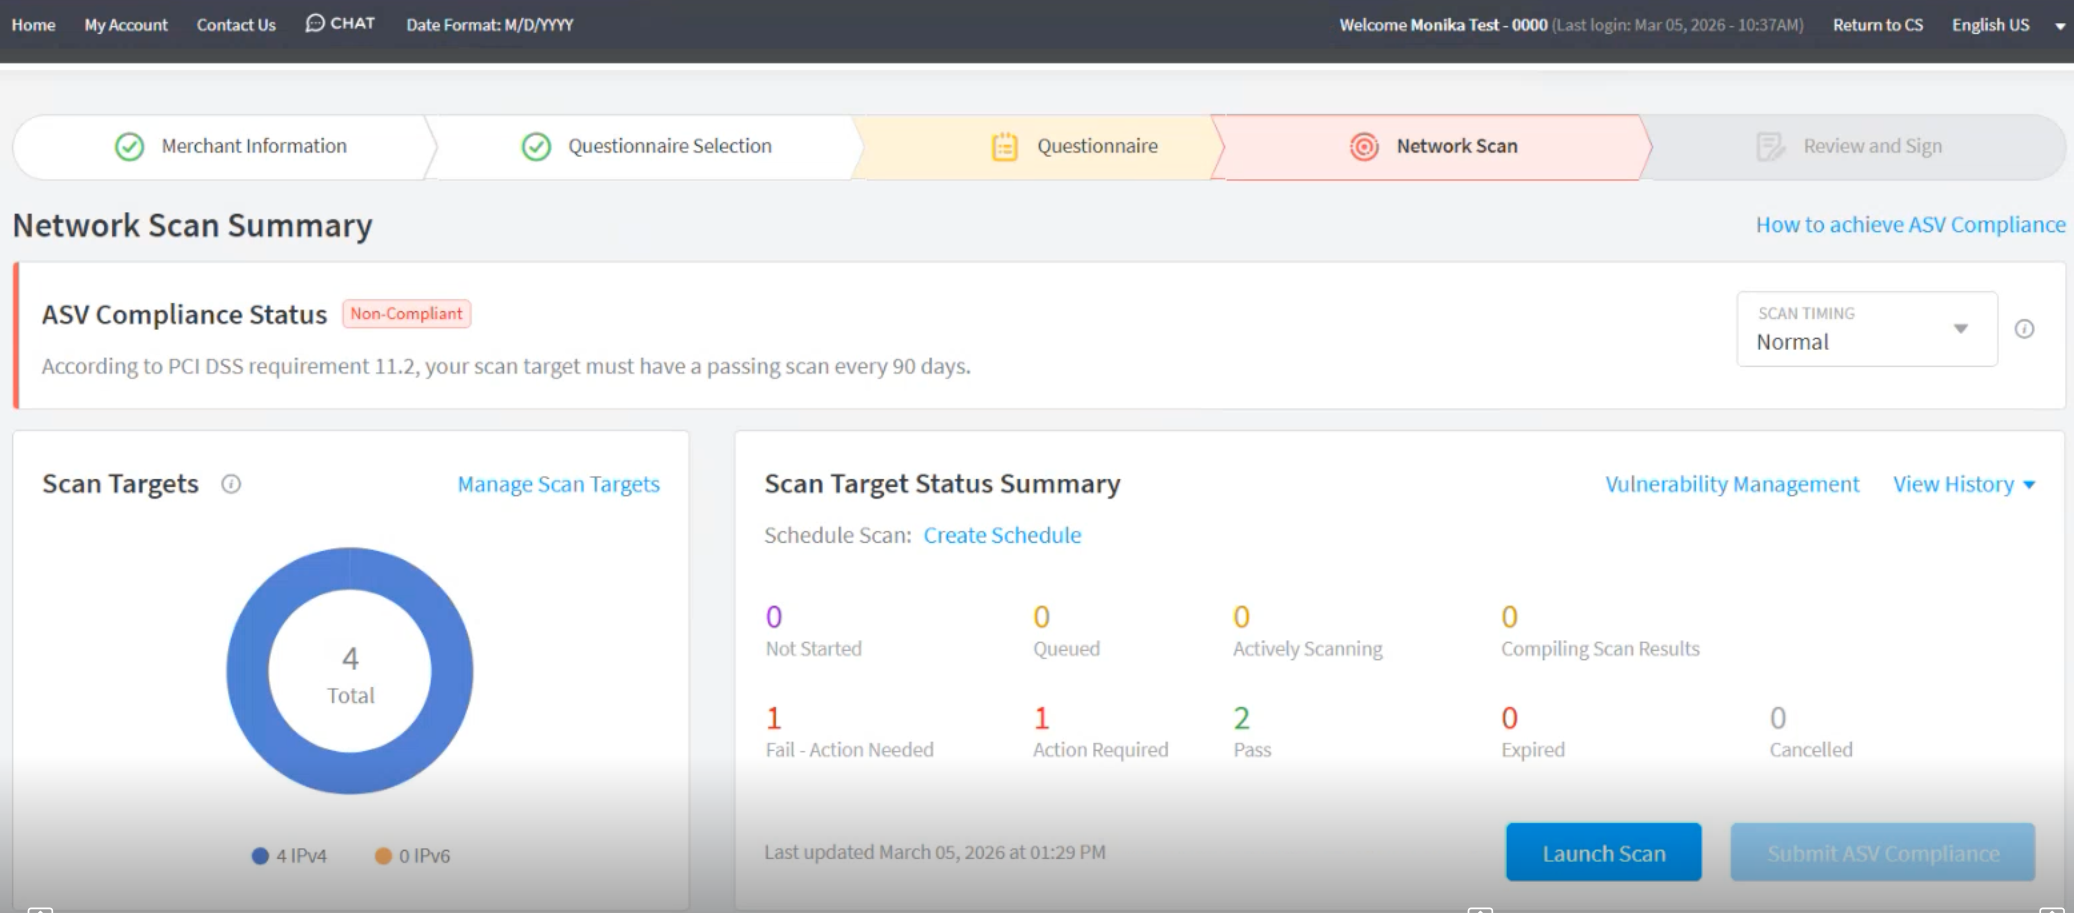
- To begin, click the Manage Scan Targets.
- On the Manage Scan Targets page, enter the IP address or domain name. You can also import from a file.
- Click Add. Depending on your account, you may have to attest that you are allowed to scan the entered target.
Scanning Targets
If you select a domain with multiple IP addresses or arrange of IP addresses, you will need to confirm that those IP addresses are to be scanned. You can remove or delete IP addresses that are not in scope or are not used in card processing.
Why do I need to scan my network?
Under the current PCI DSS 4.0.1 standards (mandatory as of 2025/2026), the requirement for network scanning has expanded. Even some "low-risk" merchants who were previously exempt now have to perform them.
The SAQs that require a network scan are broken down below:
These scans are performed by an Approved Scanning Vendor (ASV) and look at your network from the outside.
SAQ A: (New in version 4.0) If you are an e-commerce merchant using redirects or iframes, you now must perform quarterly ASV scans.
SAQ A-EP: Required for e-commerce merchants who host their own payment page (partially or fully).
SAQ B-IP: Required for merchants using standalone IP-connected point-of-interaction (POI) terminals (e.g., a card reader plugged into your office internet).
SAQ C: Required for merchants with payment systems connected to the internet (but not storing card data).
SAQ D (Merchant & Service Provider): Required for all entities that don't fit other categories or those that store card data.
Launching a Scan
- On the Network Scan page, click Launch Scan.
- In the Launch Scan window, select the IP addresses or domains to be scanned.
- Click Launch Scan.
A typical scan can take 24-48 hours to complete.
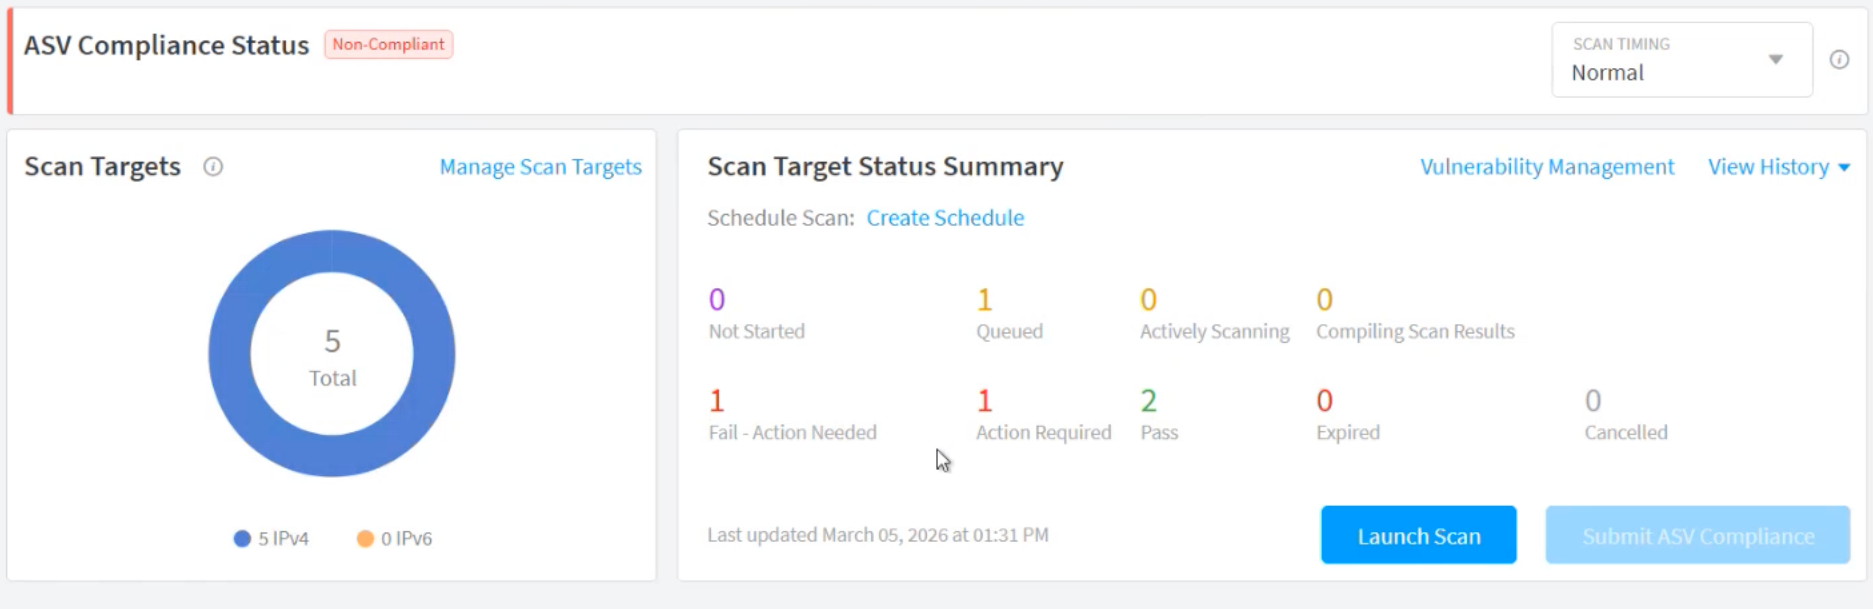
Network Scan Actionable Tasks
Pass - The scan ran successfully, and no issues were found.
Fail- Action needed- The scan completed successfully, and potential vulnerabilities have been identified.
Action required - The scan was successful, but further clarification and answers are needed to continue.
Scheduling Scans
You can schedule scans so you do not need to log in each time to initiate a scan. By scheduling a scan, your required scans will occur without intevention and you can remain in compliance.
Scheduling a Scan
Use this process to schedule a scan to automatically launch on a specific date, or to set up recurring scans on a weekly, monthly, or quarterly basis. The schedule includes five scans, regardless of frequency.
- On the Network Scan Summary page, click Create Schedule to open the Scan Scheduler.
- Click the checkbox for each IP address or domain name you want to include in the scan.
- Click Next.
If you select or deselect a domain that is associated with multiple IP addresses, all the
associated IP addresses will be selected or deselected. - Select the Frequency of recurrence. You can also choose a specific date.
- In Scan On, select the desired recurrence for the selected frequency or specific date.
If you selected Quarterly, the next five scan dates are calculated and displayed. - Click Submit to schedule the recurring scans. The next scheduled scan date appears in the Scan
Target Status Summary section on the Network Scan Summary page.
Updated about 1 month ago
What’s Next
For additional help, you can review the full documentation suite in the Resources menu. You can reach out to Aperia directly for specific guidance or issues by clicking the Contact Us or Chat buttons in the top-left menu.